STAND BY ME

Saturday, September 29, 2012

VINTAGE ANCESTORS JOURNAL

As many of you know, I love round robin journals and have been lucky enough to do numerous journals with the same group of wonderful ladies for years now.

Our latest project is called VINTAGE ANCESTORS.  This is the idea:  Everyone creates a journal and starts it off with a family or family member with the use of cabinet cards!  If you are familiar with cabinet cards, it appears that only ugly people got their pictures taken back then.  They are AWFUL!!

There are 10 artists in this group.  They can choose to leave the ugly relative as is or alter their cabinet card.  They now write a story about this family/relative and send it on to the next person.  This next artist adds a relative to this family.  On one side they will have their cabinet card and on the other side a story about that relative.

With the amazing ladies in this group I can not wait to hear about all my lost relatives!!!  It is bound to be a journal of hilarity and fun!

Today I started my journal.  I have had an idea in my head for a while and I'm happy to report I was able to bring that idea to life! (Now, THAT, does not happen often so humor me here!).

I went to Ebay (one of my favorites haunts) and purchased a vintage cabinet card album.  You know those albums..... the one that house all those ugly people?

I took the album apart as so.....


These are the cabinet card photo pages that came in the book.  Each of these pages "house" two cabinet cards back to back.


 I then cut bristol paper to size and folded it in half to make the pages for the signatures.


What I wanted was to use the cabinet card photo pages in the journal but allow a page for the writing and art.  You have a cabinet card slot on the right with a page for art on the left, and when you flip the page, you can place a cabinet card on the left and do art on the right.  Seemed easy in my head....


I was quite proud of this idea but had some technical difficulties with it. How as I going to put the photo page in between the folded bristol page?  How was I going to secure it down so that even with all the manhandling it would receive, it would not fall apart?


I then decided to put the photo page BEHIND the folded bristol page.  I could still accomplish what I wanted and there would be two blank pages after every layout which could be used to add some extra collage work or art by those who wanted to add something else.  If not, they could just be taped closed and voila!  No worries.


First I used the tissue  tape to tape the photo page to the bristol paper but it seemed flimsy (because the photo page is relatively heavier)  and didn't give me a soft and fuzzy feeling.  So now what?


Tyvek of course!!!  I cut strips of Tyvek and put tons of scor-tape on them.  I then attached the photo page (which is heavy) to the bristol page with the Tyvek.  This was becoming indestructible!


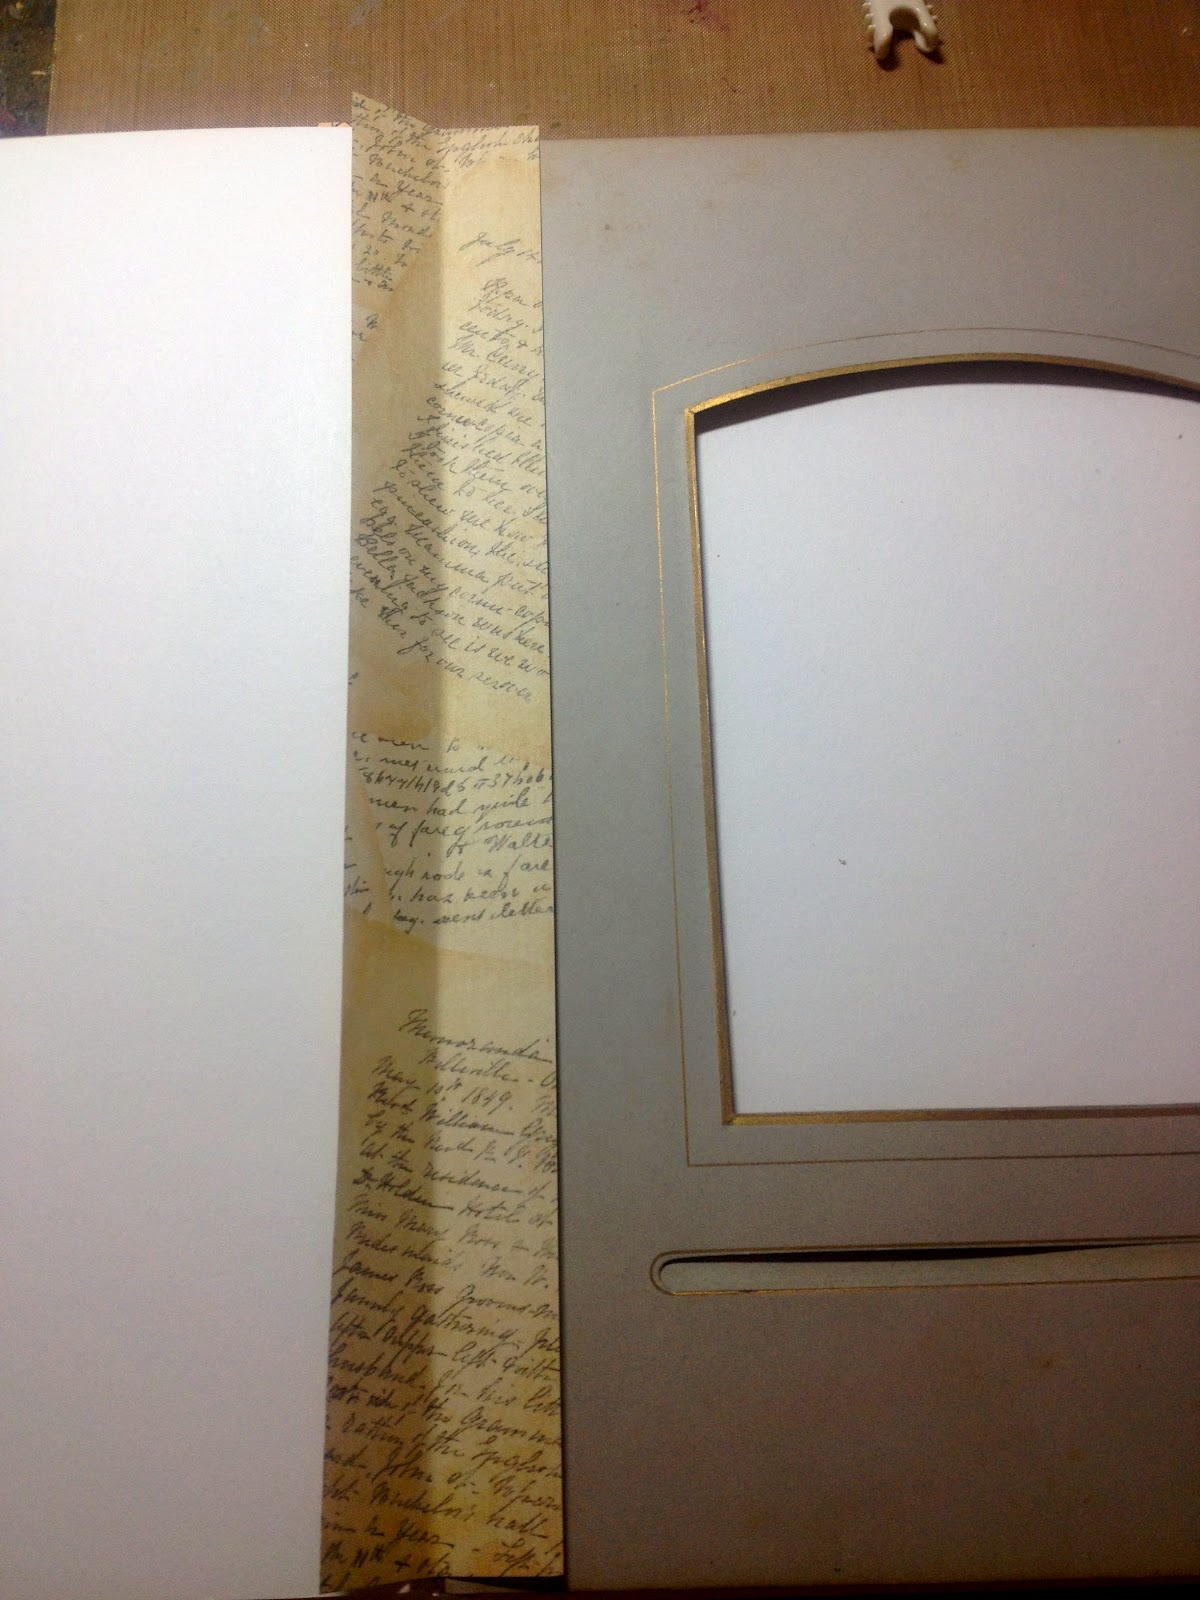
So now I have the photo page securely attached to the bristol paper and am still not happy.  The space between the bristol paper and the photo page looked ugly.

SEE??????

So I cut up some pretty vintage papers in strips and added them with scor-tape to all the areas between the pages - both the bristol to bristol and the bristol to photo page.  Not only did it look great, but it was yet another reinforcement.  (This Journal can go to WAR!)


This is what the book block looked like after all the above was done.  Pretty Huh?  Too bad I don't want to leave it like that!


Back to the Tyvek!  I cut a strip of Tyvek and covered the entire spine of the book block with it.  Not only does this mega-secure the book block, but it allows me to tape the spine to the fabric that will cover it.

When you open the book, this is what you see. What I had originally wanted.... a photo page on the right with the art page on the left.. and
 When you flip the photo page, you have another cabinet card slot on the left with the art page on the right!

The fun part has to wait.  I'm so done for today!   Time to pull out lace, doilies, flowers, charms.... oh lord!!!  The possibilities to decorate this book are ENDLESS!!!

Friday, September 28, 2012

NEW TOY ALERT!!!

The Fiskars ProCision Paper Trimmer is FANTASTIC. A little pricey at $100 but if you need a good trimmer that will last - this is it. Shop around. They are promoting this now so a lot of online stores have it for up to 40% off.


- Posted using BlogPress from my iPhone

Thursday, September 27, 2012

Mail Art Project

In one of my groups I signed up for a mail art project.  I am really glad I did.  I had never done it before and I really enjoyed it.

I had seen a youtube video where the artist made mail art using regular office manilla file folders.  I loved the idea of the envelopes being strong and tried my hand at a few of those.

You start with a letter size manilla folder and you cut it to the size you want your envelope to be.  (Don't throw away the other part of the folder!!  You can cut tags out with the Alterations Tag Die!).


After some collage, some stamping and some this and that.....


Voila!  Mail Art!


This one was also done with a file folder by with color sprays instead of paper collage.

I wanted to see how a regular Size 10 envelope would work out with mail art.  Not happy at all.  I opened the envelopes to be able to work on it as one sheet.


I sprayed the envelope with some beautiful sprays from Lindeys' Stamp Gang.  The paper was so flimsy I was not at all happy.  I thought maybe it would stiffen some after being sprayed.  NOT!


When the envelope continued to be way too flimsy, I covered the inside of the envelop with black cardstock. NOW we're talking.


Some stamps...   and MORE mail art!


I need to send out 10 in total so 6 down and 4 to go!

Tuesday, September 25, 2012

Mail Art Extraveganza!

Bought tons of stamps specifically for mail art. A bunch came in the mail today ! HAPPY PLACE!

Also bought blank stamp pages to make my own artistamps (faux stamps) to add to my mail art.

Have done a few mail art envelopes and will be posting when finished. This is so much fun!!

Hmmmmmm..... Maybe I should open a mail art group.

- Posted using BlogPress from my iPhone

How cool is THIS?!

My friend Marita gave me an idea the other day. Seems she is making an art journal out of an old ledger book. It sounded really cool so of course I got on ebay and bought an old ledger book. And I mean OLD! It is from 1939. Its really in great shape and a wonderful size 8x14.


Its the 1939 Tax Collectors Record from Old Lycoming Township. I cant even imagine keeping all these records by hand!!


I think it will make a great art journal! One more item on my things to do list.

- Posted using BlogPress from my iPhone

Friday, September 21, 2012

SARAH's EVOLUTION JOURNAL

I just finished the pages for Sarah's Evolution Journal.  The entire journal seems to be evolving into the general theme of LIFE.

I absolutely love this quote and thought Sarah would enjoy the Zetti pages in her journal.


The quote is by Charles Schultz and says:

"I think I've found the secret to life - you just hang around until you get used to it."

Gotta love that.

Thursday, September 20, 2012

TIM HOLTZ TICKET STRIP DIE

I came across this video today and am amazed with this woman's use of this die!!!  (See, this is why I buy them all!!  Eventually I find something to do with them!!!)

This video is a MUST SEE!!!