This past March we had our 5th Keys 4 Art Retreat and like always, it was amazing! My sister-of-the-heart, Eileen Bellomo always gives a wonderful account of our retreat on her blog and with her permission I am sharing it here with you!
SIT BACK AND ENOY!!!
Keys 4 Art 2014, Part 1
All winter long we think about, plan for, shop for, create keepsakes for, and look forward to Keys 4 Art, the annual Florida Keys retreat I have been attending for the past 5 years with my art sisters. Some, like Pat and Teri are friends here in NYC, but the rest come from all over the US and Canada. Which makes our yearly get together so special. And then, poof! It's over. One of the reasons I love to blog about our adventures is to relive them. So here goes, Part 1.
Pat, Teri and I met up at the airport, and found we'd been randomly selected for VIP status. That meant we were swept through security and didn't even have to take our shoes off! Good start. Our flight left on time, was uneventful (always a good thing), and we were able to have a leisurely lunch in Miami before meeting up with the rest of the gang. A van met us and took us to the fabulous house that Elena and Jacquie had found.
An early riser, every morning I woke up in time to enjoy the sunrise in solitude.
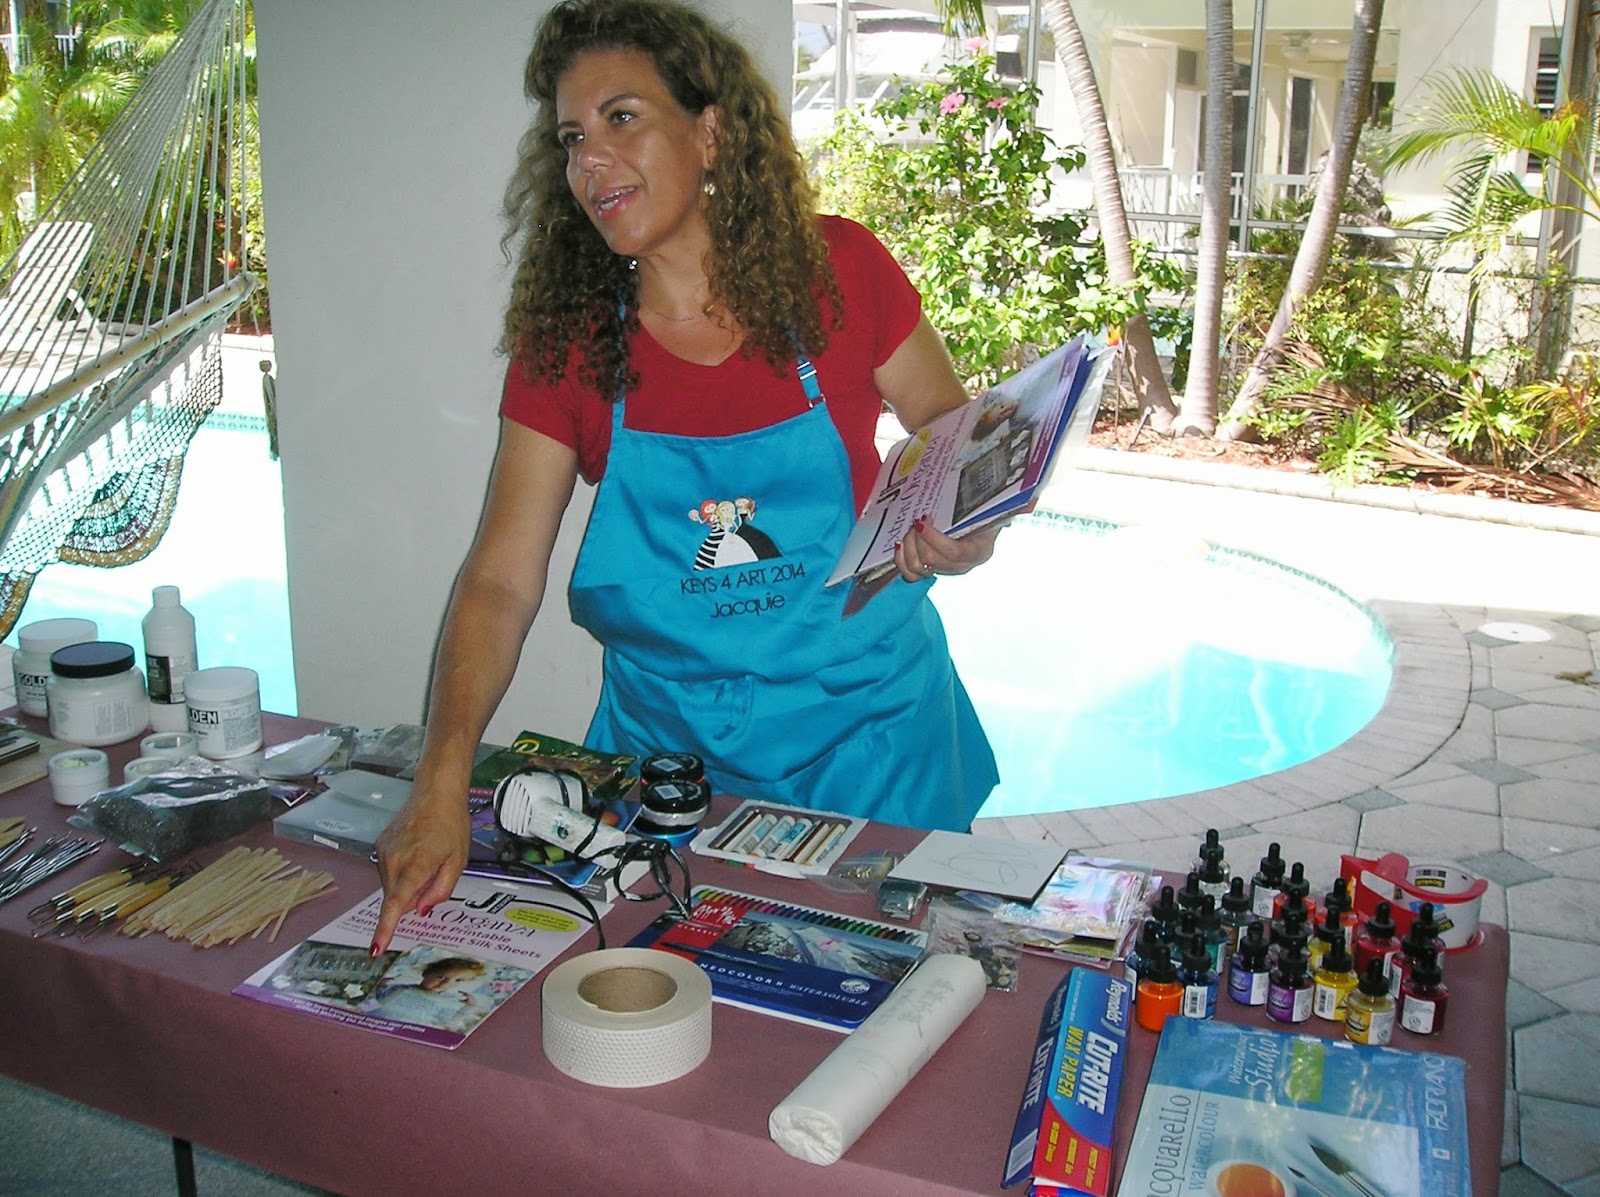
Our first full day belonged to Jacquie, who must have literally brought her entire studio along with her. Thankfully, she lives in Florida, so it all fit in her car. She could never have provided such great instruction for us if she had to think about packing for a plane trip. Her topic, encaustics. If you're a regular reader you know I had an unfortunate experience with an encaustics class a couple of years ago; too many students, not enough supplies, and very poor teaching. Jacquie made up for that big time. As you can see, we held this class outdoors, so toxic fumes were not an issue. Plus, being creative in such a great setting, with views of the pool and the ocean.....not too shabby.
Above, just ONE of the tables of supplies and equipment Jacquie brought. We had many substrates to work on, and I finished these two 6x6" pieces. Any cloudiness has long since disappeared, and I love the way they turned out.
Here are a few of the wonderful pieces my friends did:
If you're unfamiliar with encaustics, I suggest Google for lots more information than I can provide. And if it intrigues you, take a class.....but do a little research, ask questions, and try to get a recommendation from someone whose opinion you trust.
My next post will feature a fabulous canvas called "Steampunk Dragonfly" that Pat brought for us to do. Stay tuned!
Keys 4 Art 2014, Part II
Greetings from Keys4Art! (Oh, how I wish I really was still there. Especially after yesterday's deep freeze and snow. But don't get me started). Before I get to the art activities of the day, I want to share some of the gifts we all gave/received. First, Elena. What can I say about our hostess and founder? In addition to being a loyal friend, a fun companion, a devoted mom, and a whole bunch of other cool things, she is hands down, the most generous person I know. When we arrived at our rental house it was all set up for us, and at each seat, a whole bunch of incredible gifts. And the pile just kept getting larger as we all gifted one another and Elena added more as well. I truly am blessed to call these women my friends.
Because our two day workshop with DJ Pettitt would involve sewing, Elena thought we each should have a Janome mini to use (and then, to take home).
Pretty fantastic, right? And this little, 5 pound machine works like a champ. If you've ever hesitated taking a workshop because it involved schlepping a sewing machine with you, consider this. Easy to operate, and did I mention, only 5 pounds. Thank you, Elena!
And then, there was the beach towel, pretty pink satchel, t-shirt, personalized apron, pencil case, tote bag.....
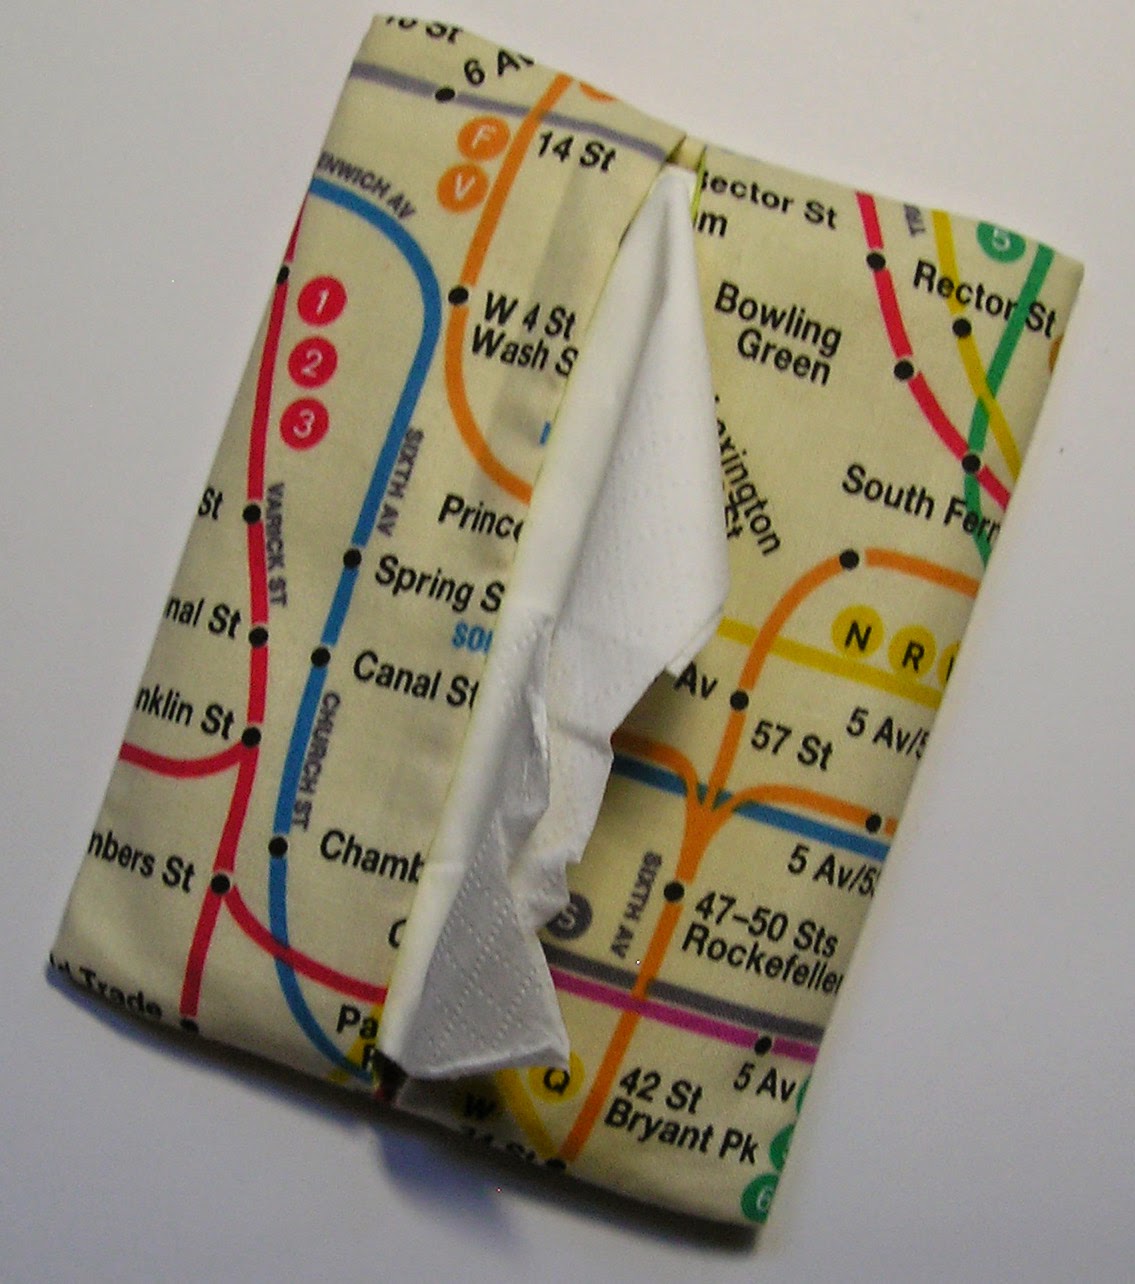
I bought this great NYC fabric at The City Quilter.
And used it to make everyone a tissue holder.
Every year Jen makes a great music mix and we each get a disc. This year, she did her research, and actually found at least one song for each of our names. And here I thought I was only memorialized in "C'mon Eileen," by that one hit wonder, Dexy's Midnight Runners. Nope, Jen found another Eileen classic. So, we each received the mix and the "say my name" compilation. Speaking of mixes, Jen is also a very excellent mixologist of another kind.
Many of the gifts were small hand crafted items, or things picked up in travel, and they made their way into my Keys2014 journal. Below, tags from Sue and Lill, a real porcupine quill from Sue (from her very recent Africa trip), a cupid from Pat, and a paper kimono from Carla. There were others, as well, including paper for our journals, journal inserts, and ...... I know I've left things out, but honestly, there was so much sharing and giving, I found things on my table with no clue where they came from. Thank you everyone!
Our first full day was mostly spent doing a beautiful canvas with Pat as our teacher and guide. She called it "Steampunk Dragonfly," and it is not only beautiful, but incorporated some techniques I know we'll be using again and again.
This is not a licorice puree, but the result of Pat's recipe for homemade texture paste. Worked like a charm! Here is my canvas about midway through the process. You can see the black paste used to build up texture as well as act as an adhesive for many of the steampunky embellishments we used.
And the finished piece, which is even better in person, and which I love. And by the way, Pat provided virtually everything we needed for the project. Many thanks, Pat for a fun day.
After dinner (Karen's gumbo, y'all) Daisy led us in a button bracelet class. I didn't think I'd like it, and it wound up being one of my favorite accessories. And all you really need is a strip of leather or suede, some velcro, a LOT of buttons and other do-dads, and some good glue. Here is a lineup of our bracelets. Mine is the one in the upper right.
Now, in addition to any other quirks I might have, I have a real "thing" about naked buttonholes. You know what I mean....buttonholes with no thread. Just don't care for that look. I started working on that problem at the retreat, and finished when I got home.
That's what I'm talking about! Stamp out naked buttonholes! When thread is not an option, just add some bling. Daisy, you won me over. I wear this all the time. Thank you!
The next time I post the subject will be the wonderful, the talented, the beautiful DJ Pettitt, and the totally gorgeous books we made with her. Stay tuned!
Keys 4 Art 2014, Part III (DJ Pettitt is in the house!)
Ever since I discovered the wonderful world of art journaling, book binding, and mixed media, I have wanted to take a class with DJ Pettitt. I'd look at her glorious creations online and drool. Last year that dream came true in the form of a four day workshop DJ gave at Donna Downey's studio in North Carolina. I met Elena and Jacquie there, and we had such a great time, learned so much, and enjoyed DJ, both as an artist/teacher and human being. So much so, we wanted the rest of our art sisters to have the same experience. If you follow DJ (and if you don't, you should!), you know she is a passionate and talented photographer, especially of birds, and the lure of being able to get some shots of Florida wildlife was too much for her to resist. So, DJ Pettitt is in the house! We spent the next two days with DJ, and they were wonderful! And after our workshop was over, and we went on to other art projects, DJ spent her days out and about, going to bird sanctuaries and getting those photos she wanted. Check out DJ's blog (link highlighted above) to see what she saw.
DJ brought lots of her journals and some tote bags to inspire us.
DJ is a generous, patient teacher, and she spent as much time as was necessary with each of us.
Our books consisted of two signatures, with the pages connected by fabric "hinges." In this photo, DJ is watching as a template is used to mark the holes for binding. DJ has an amazing technique for book binding that is not only beautiful to look at, and results in a very sturdy book, but is easy to do.
We created covers, entirely out of fabric, embellished them, and then did the same for the inside covers. We also did a wrap which went around our two signatures. The hinges I mentioned were temporarily held in place with a glue stick, then sewn in place on our machines. (Helpful tip from DJ: Use Elmer's Extra Strength glue stick. It will NOT gum up your machine needle.) Some machine stitching was also added, if we wanted, to the journal pages themselves. The following photos are all of my book. Not my usual color scheme, but these are the colors I was drawn to for this project. Considering our tropical setting, fitting, I think.
Here are some of the books my friends made.
Using DJ's binding technique, the buttons on the spine are not merely decorative; they help hold the whole thing together. Look at this beautiful lineup:
If you ever get the chance to take a class with DJ, run, don't walk, to sign up. And remember, you will only add 5 pounds to your luggage if you bring along a Janome mini sewing machine. Just trying to help.
Keys4Art 2014 - Alebrijes!
Teri introduced us to a Mexican folk art which results in wonderful, colorful creatures.....alebrijes. Being the super organized educator she is, Teri's workshop came complete with visuals, handouts, and a brief history.
Here is what I learned about this art form: Alebrijes (Spanish pronunciation: [aleˈβɾixes]) are brightly colored Oaxacan-Mexican folk art sculptures of fantastical creatures. The first alebrijes, along with use of the term, originated with Pedro Linares. In the 1930s, Linares fell very ill and while he was in bed, unconscious, Linares dreamt of a strange place resembling a forest. There, he saw trees, animals, rocks, clouds that suddenly turned into something strange, some kind of animals, but, unknown animals. He saw a donkey with butterfly wings, a rooster with bull horns, a lion with an eagle head, and all of them were shouting one word, "Alebrijes". Upon recovery, he began recreating the creatures he saw in cardboard and paper mache and called them Alebrijes.
There was already a tradition of wood carved creatures in Mexico, and eventually there resulted in a marriage of the two arts.....traditional carvers began to paint their pieces with bright vivid colors. For our workshop we stuck to the paper mache variety.
Go, Teri! At home, she prepared our creatures with a coat of gesso so we could get right to decorating.
Here is what we were given:
I decided to paint mine black and then add patterns using paint, paint markers, and various pens (glaze, gel, souffle).
We decided to name our gators. Meet Floradora. And here are a few of her friends:
I knew just the right place for Floradora when I returned home. Here she is, happily climbing a wall with a couple of very distant relatives.
I found this photo online. What wonderful colors and designs!
I would love to have an entire menagerie creeping and flying around my home. As long as they were just the imaginary kind, of course. A lone water bug once kept me awake in terror for an entire night. But that's a whole other story.
Keys4Art 2014, Part IV, This and That
In addition to the projects that took a day, most of a day, or more than a day, we did several "quickies," which were just as much fun and certainly added to our arsenal of techniques. We also took the time to leave the premises for a wonderful dinner complete with a view of the stunning Key Largo sunset. Here we go!
Karen showed us how to decorate silk scarves with Sharpies, stencils, and rubbing alcohol. Would you believe that this:
Turned into this:
My caption for this photo is, "Wake up! We're showing off our scarves!"
(sleepyhead me, Pat, Jen)
We traced stencils onto the silk with metallic Sharpies, then filled in and made random marks with regular old Sharpies. Wad it all up and spray with the alcohol. Pretty amazing, and oh so easy.
I showed the crew how to make felted soap, another easy project and a great gift. Here we are, getting soapy and having a good old time. So nice to be able to do wet and/or messy projects outdoors.
(Jacquie, Teri, me, Sue, Jen, Elena)
I didn't get a shot of everyone's finished soaps, but here is the one I did as a sample.
In case you haven't seen them before, felted soaps are often sold in pricey shops for $15 and up....each! The idea behind them is that you get a soap and washcloth in one. The wool shrinks as the soap does. It's really kind of cool.
Pat did a quick tutorial on a gesso resist using gelatoes. Great fun.
Daisy shared with us two pages from her book of class samples. She has a loyal following back home that just loves to take classes with her.
I mentioned going out for dinner. Well, we ate pretty well at home too. Pat and I made salads, Elena did enchiladas, Karen cooked gumbo, and Jacquie did some awesome meatballs in homemade marinara, as well as her famous paella:
On a lovely evening we went here for drinks and dinner:
It's right on the water, and we stayed for hours, enjoying the company and the views.
(Teri, DJ, me)
(Teri, Pat)
(Luca {Jacquie's son}, Jacquie)
(Jen, Sue, Karen, Jacquie, DJ, Teri)
(Elena and Jacquie, our two fearless leaders, movers and shakers, organizers extraordinaire!)
I ordered one of the specials, hogfish. Never had it before, never even heard of it. It was delicious!
Besides the food, this is why people come to Snook's:
And every night, as the sun disappears, a bell is rung. They take their sunsets very seriously in the Keys.
One of the gifts Pat made for each of us was a little book.
Coincidentally it contains as many pages as we had participants, which gave Jen the brilliant idea that we each write a word on a page in everyone's book to describe that person. We did that after dinner on our last night, and it was a sweet activity. Modesty prevents me from sharing with you what was said about me. Just kidding! No one had a bad word for anyone, which is why we continue to look forward to this week every year. Keys4Art......5 years and counting!
I know that Elena and Jacquie are already plotting next year's retreat, and I admit to have started thinking about what to make as gifts, what to teach, how to better pack.....Remember, it's the journey (or in this case, the anticipation) more than the destination. Okay, it's also the destination. Thanks for coming along with me!
THANK YOU EILEEN!!!! YOUR RECAPS ARE ALWAYS WONDERFUL!


Thanks for re-posting. I never tire of reliving our wonderful retreats!
ReplyDelete